For many photographer post production is the pivotal moment where any image is turned into something extraordinary. With Photoshop now in its 25th year it has received over 20 major updates and created possibilities that were not even imagined at its conception. We can now do everything from photo post production and designing websites to editing videos with hundreds of new and old tools alike! However, amongst all of these we can easily lose our way, and just a handful are often all that are needed to provide us with that extra step closer to something unique and memorable:
One – Colour Lookup
(Layer>New Adjustment Layer>Colour Lookup)
Colour Lookup has a variety of preset adjustments you can use to stylise or improve colour in your images. Using the 3DLUT drop down menu you can add film effects, boost colours or add atmosphere to a variety of scenes.
Two – Puppet Warp
(Edit>Puppet Warp)
In some ways this is similar to our favourite Liquify tool, however this provides greater control to modify facial expressions, body shapes, object shapes and more. Simply drop pins to freeze parts of your image or drag to adjust to your liking.
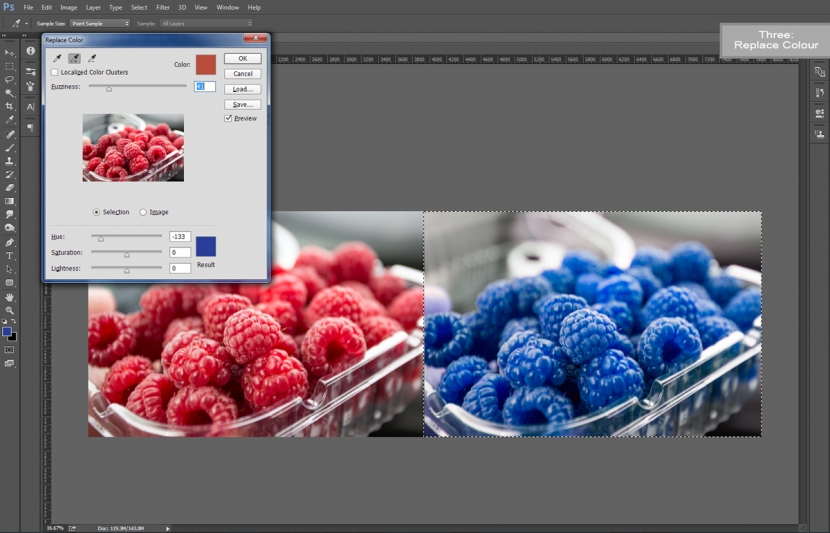
Three – Replace Colour
(Image>Adjust>Replace Colour)
Changing hair, eye or shirt colours? This tool lets you quickly isolate hues within an image and adjust them to whatever colour you like for natural or surreal results. Use the eye droppers at the top to add or remove colours from your selection.
Four – Equalise
(Image>Adjust>Equalise)
For over cast conditions or situations where images are looking a little flat. Equalise will spread tones evenly between black and white to provide more structure and contrast in a scene. Blending the result with your starting image can provide great depth to an otherwise plain photograph.
Five – Colour Range
(Select>Colour Range)
Struggling to make changes to specific tones within your image? Perhaps your sky is too bright, your shadows too dark or skin tones too warm? This tool will allow you to easily isolate areas based on their brightness and then apply any adjustment to them you desire. Combined with adjustment layers (Layers>New Adjustment Layer…), the possibilities are endless.
With these tools and more at our fingertips it is unfortunately very easy to forget that before we enter the digital dark room we must first start with a great image. A thorough understanding of photography as a craft will always provide us with the greatest gains and help us stand out from the global crowd that is photography. With this in mind, we encourage you to always pursue greater knowledge by networking, self directed research, getting involved in workshops, enrolling in courses.
One excellent opportunity for this is the online Professional Photography Course by The Photography Institute. You can sign up from the comfort of your own home or favourite cafe and work through a Diploma course at your own pace with the assistance of a dedicated Tutor. http://www.


